
Merchant Payment
Summary
OneLinQ Merchant Pay API facilitates Merchants to provide Pay by Bank Via Open Banking Rail option as a payment option for the online purchase by Buyer. Merchant Pay solution uses Open Banking/Faster Payment/SEPA Instant payment or equivalent real-time payment rail to enable online transfers and inform the Merchant instantly of the payment initiation.
Key Features
1. Secure data access
2. Real-time Payment Transfer
3. Instant Notification of Payment Initiation
4. Results in JSON/PDF
5. Compliance with regulations
6. REST API Integration
7. White Labelling support
8. Multilanguage support
Merchant Payment APIs
API Name | API Endpoint | API Description |
Merchant Payment Initiation Request | POST /createPayment | Merchant Payment Initiation request API. |
Merchant Payment Status | GET /paymentStatus/{paymentId} | Merchant Payment Status API. |
Merchant Payment Flow Diagram
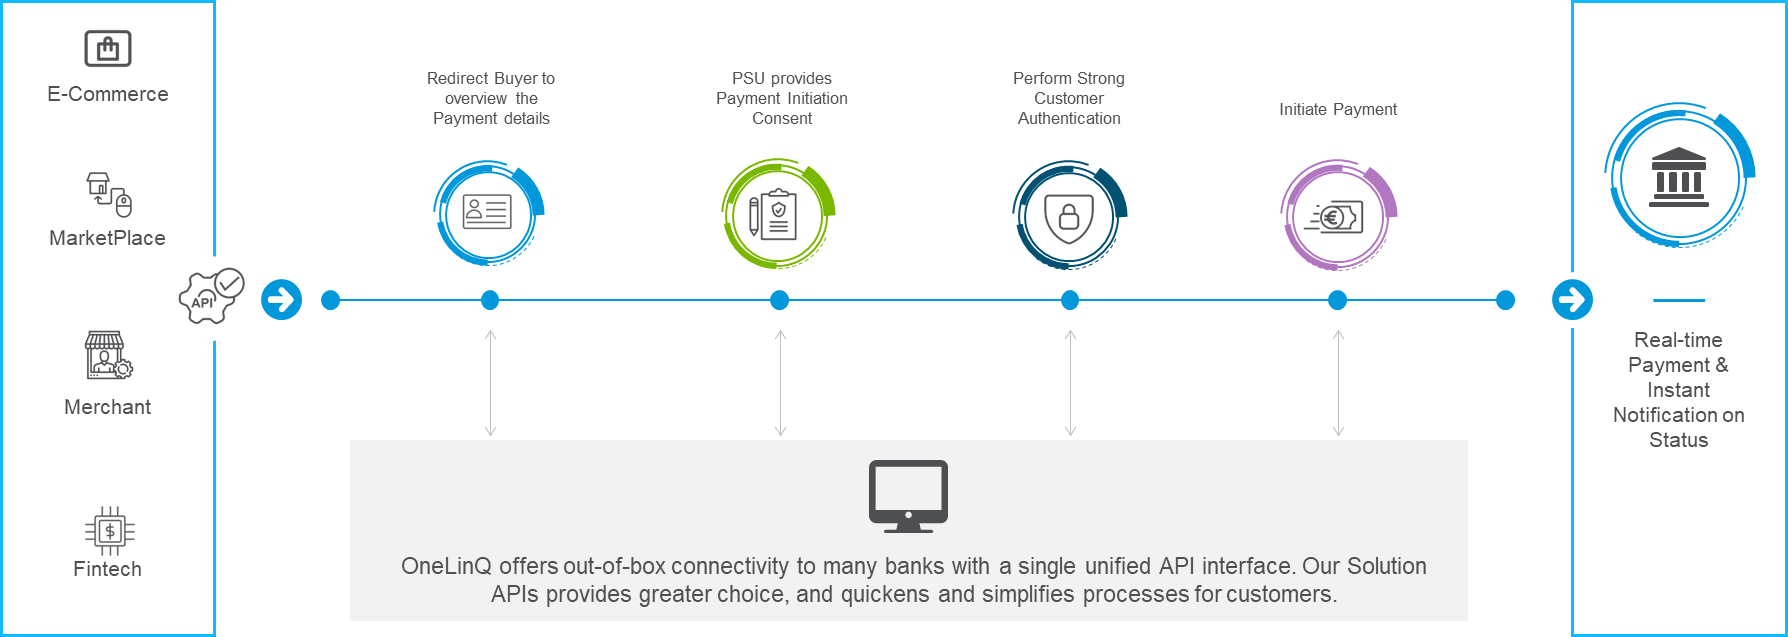
Merchant Payment Steps
Step 1 : Payment Request – Merchant
The buyer selects one or more products that he wishes to purchase in the webshop of a Merchant (e.g. SAP Hybris). At the checkout, the buyer selects OneLinQ as the Payment method, and the Merchant requests OneLinQ to initiate a payment.
Step 2 : Redirect Payment Request
The Merchant will redirect the buyer to the Hosted Payment Pages in order to complete the payment. It is also possible to directly call OneLinQ’s API to start this process. OneLinQ will receive Merchant ID, merchant's IBAN, PSU client ID, PSU Name, PSU IBAN, Nominal Amount including VAT, Currency, Payment Reference Number, PSU Country, PSU IP Address, Device, Date and Time of the session.
Step 3:Validate bank account
If the buyer has provided the PSU bank account during previous transactions and has been stored upon request it will be displayed on the Hosted Payment Pages. The PSU is able to validate these details and change them if required. If the bank account details are not provided by the merchant, the PSU needs to provide his bank account and IBAN to continue to the next step.
Step 4: Payment Initiation Consent
Once the PSU ordering account is confirmed, OneLinQ displays a summary of the Payment Initiation request and PSU consents to the payment request in the Hosted Payment Pages. Successful authorized payment requests are considered final.
Step 5: Initiate Payment
OneLinQ will use the PSD2 API interface of the nominated PSU ASPSP to initiate the payment.
Step 6: Strong Customer Authentication
In case if the PSU ASPSP asks for SCA then OneLinQ will support all the possible three options of Authentication viz. Embedded (Default), Re-directed, De-coupled.
Step 7: Execute the Payment
The bank will execute the payment and send the money to the merchant's account, after it is successfully authorized by the PSU.
Step 8: Payment Confirmation
OneLinQ displays a payment confirmation page with the status of the request. In the case where the status of the payment is “pending” then OneLinQ will keep polling the status from the PSU bank till the final status is received. The merchant can fetch the status from the status API or use Payment Webhook API which will notify the merchant about current status.